| Key idea | Details |
|---|---|
| 🎨 What it is | The art of building 3D objects out of paper. |
| 🔍 Model selection | Select simple projects for beginners. |
| ✂️ Preparation | Precise printing, pre-folding and die-cutting. |
| 🛠️ Assembly | Fold and assemble according to pattern. |
| 🖌️ Personalization | Coloring, painting for a unique object. |
The discovery of papercraft, a fascinating 3-dimensional creation technique using paper, offers an infinite range of possibilities, from simple models to extremely complex structures. This manual activity, which combines precision and patience, stands out for its accessibility and its ability to transform simple sheets of paper into veritable works of art. Here’s a step-by-step guide for enthusiasts eager to delve into this captivating world.
What is papercraft?
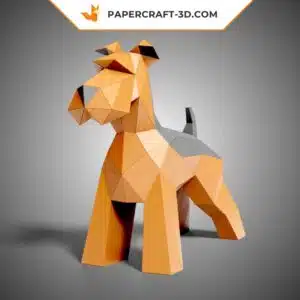
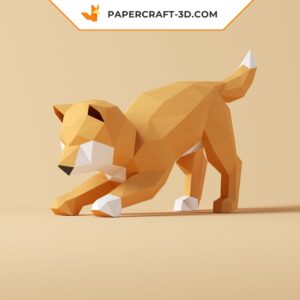
Papercraft, also known as pepakura, is the art of building three-dimensional objects using paper. This technique differs from traditional origami in that it allows the use of multiple sheets cut and assembled together, sometimes with glue, to create more complex and detailed models. The world of papercraft encompasses an impressive variety of creations, from simple geometric structures to detailed reproductions of animals, characters from video games like Minecraft, or iconic vehicles and buildings.
Model selection and printing
The papercraft process begins with the choice of a suitable model. For novices, it’s advisable to select simple projects, characterized by fewer parts and reduced complexity. Online platforms offer a range of models, categorized according to different levels of difficulty. Once the model has been chosen, the next step is to print the pattern on suitable paper. Ideally, the paper weight should be between 180 and 200 g/m² to ensure sufficient rigidity of the pattern without compromising its workability during folding and assembly. Although A4 is the most commonly used format, some larger models require paper in A3 or even A2 format, necessitating the use of special printers or the services of a professional printer.

Preparation and assembly
There are several methodical steps involved in assembling a papercraft. First and foremost, pre-folding the paper can greatly facilitate the process. Using a suitable tool, such as a folding knife or the back of a cutter, it’s possible to precisely mark the fold lines, guaranteeing better definition of the final model. Cutting follows, requiring special attention to follow the contours of the pattern faithfully. Once the elements have been cut, they are folded according to specific indications, distinguishing mountain folds from valley folds, thus facilitating respect for the desired three-dimensional structure. Thefinal assembly of these folded and cut elements is based on aligning and securing the tabs together, using the numbers indicated on the pattern to guide the assembly of the various parts.
Finishing and customization
Once assembled, the papercraft model opens up a vast field of personalization possibilities. Painting, coloring or adding decorative elements bring the model to life, reflecting the creativity and individuality of its creator. Some models can be used as props in stage productions, as decorative elements for play sessions, or as original decorative objects. The satisfaction of creating a unique object from a single sheet of paper is the ultimate reward for the time and effort invested in a papercraft project.
| Step | Materials required | Additional tips |
|---|---|---|
| Printing | 180-200 g/m² paper, printer | Choose a model to suit your level |
| Pre-folding | Folder, cutter back | Mark fold lines precisely |
| Cutting | Cutter, cutting board | Follow contours carefully |
| Bending | Ruler, folding tools | Follow mountain/valley fold indications |
| Assembly | Glue, patience | Align tab numbers |
| Personalization | Paints, markers | Give free rein to your creativity |
The aim of this guide is to demystify the process of assembling a papercraft, from choosing the model to finalizing the work. By following these steps, novice and experienced crafters alike can discover the joy and satisfaction of creating paper art objects. Each completed project not only enriches manual skills and patience, but also inspires even more ambitious future creations.